Categories
Computers

Got a beeping disk? Don’t despair!

I had a power outage a couple of weeks ago and when the power came back up I noticed that one of my servers made a strange beeping sound that I had not heard before.

My first thought was that all the data was lost. I knew that there are professional services that may be able to recover data but that they are typically very expensive. This was a private server and most of the data had been backed up anyway so paying that sort of money to salvage the disk was not an option I considered.

As it turns out, this particular issue is actually quite simple to solve by almost anyone. The only thing you need is a T6 torx screwdriver, a clean surface, a toothpick, a steady hand and some luck. It also helped that the data was not extremely valuable for me. I would perhaps not recommend this procedure if you care very much about the data on the disk. In that case it may be better to pay up. You can definitely make things worse. Don’t say I didn’t warn you.

Note that these instructions only apply if the disk beeps like in this audio clip. If the disk makes a more mechanical noise then the error is caused by some other issue and you should not follow these instructions as they could worsen the situation.

When the disk is beeping with a steady period (typically around 1Hz) it typically means that the disk head is not in its parked position when the disk is about to spin up. Normally the head moves away from the disk before the disk is shut down and does not move in over the platters until they are spinning at full speed. The rotating disks create an air flow that acts as a cushion for the heads so that they do not touch the surface. If the heads are over the platters when the disk is off then the disk will just refuse to spin up.

To fix the issue one just needs to open the hard drive and gently move the head to its parking position while at the same time turning the platters counter-clockwise.

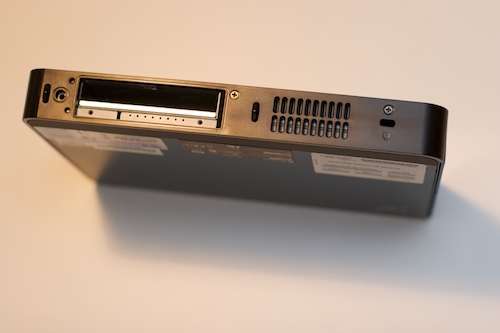
The lid covering the internals of the drive is usually held in place by seven screws. Six of those are along the edge and readily visible. The seventh is in the centre of the disk head arm and normally covered by a sticker.

You may be concerned about opening up the disk outside of a proper clean room. While it is true that the internals of the disk are delicate you should not be too concerned. The disk is constructed to be able to handle small amounts of dust that could be released from the internals of the disk during operation. The white item in the bottom right on the photo is a filter that is there to catch dust particles. The heads do not leave their parking position until the disk it at full speed and their speed creates an air flow that should remove any dust from the disk and deposit it on the filter.

When you move the head back it may feel like it is stuck at first due to static electricity. Just rotate the disk counter-clockwise while you gently move the arm back and you should be fine. I found that a toothpick is a good tool for this. The image below shows how the arm should be positioned when you are done. Then just put the lid back on and keep your fingers crossed.

If it worked then congratulations. But make sure to copy the data to a new disk and consider the old disk used, never to be trusted again.

HD OK

Categories
Linux

Switch BU-353 to NMEA mode

BU-353 is a nice little USB based GPS receiver that I use for several types of project. Straight out of the wraps it defaults to outputting NMEA data at 4800 baud which is exactly what I want. However, it also supports the SIRF binary protocol and may switch to that format. This can happen if you connect it to a system that uses gpsd. That daemon supports both the NMEA and the SIRF protocol but will switch the GPS to the latter if it can.

So how do you switch it back? Maybe you can just leave it be and the supercap inside will discharge and it will revert to its default settings. The FAQ kind of hinted at that. However, I wasn’t patient enough to see if that works so I needed a quicker option.

It turns out that if you use Windows it is not too difficult. You can follow any one of several guides on the net, for instance this, straight from the horse’s mouth.

But I needed a way to do this from Linux and this is how.

First make sure you have gpsctl in your path. If it is not installed you can install it by running:

sudo apt-get install gpsd-clients

I am doing this on an Ubuntu system but it should work on most Debian derivatives.

Then connect your BU-353 and type (assuming that your GPS device turns up at /dev/ttyUSB0):

sudo stty -F /dev/ttyUSB0 4800
sudo gpsctl -n -D 4 /dev/ttyUSB0

Then it should be back on NMEA.

Categories
Computers Linux

Upgrade BIOS on Acer Aspire One

In a previous post I wrote about how easy it was to upgrade the BIOS on Asus Eee Box. It turns out that the Acer Aspire One is just as simple.

  • Go to Acer’s support pages and download the BIOS you want to use.
  • Format a USB stick with FAT32
  • Put the BIOS image file and FLASHIT.EXE (also from Acer) in the root directory. Rename the BIOS image file to ZG5IA32.FD
  • Turn off the computer, then turn it back on while pressing Fn+ESC. Release Fn+ESC after a few seconds. The power button should now be blinking. Press the power button once. This will start the BIOS flashing process.

N.B. Keep the computer connected to AC and do not interrupt the process once it has started. Also, while the above worked very well for me I can offer no guarantees.

Categories
Computers Gadgets Linux

Automatic boot after power loss on Asus Eee Box

I have been planning to upgrade my old Mini-ITX based Linux server with an Asus Eee Box. I have purchased the Eee Box and was just waiting for the upcoming release of Ubuntu 8.10 to run on it. But then I noticed that the computer didn’t start automatically after a power outage. There is usually a setting in the BIOS for this but I just couldn’t find it on the Eee Box. Not being able to boot automatically after a power loss posed a major setback for my plan of migrating my server.

It turns out that the Eee Box BIOS prior to version 0902 didn’t have support for restore after power-loss so to solve the issue I had to upgrade the BIOS.

Normally, BIOS upgrades can be a source for some concern as there is always a risk that the computer is left completely bricked. Also, it can be difficult to get a bootable USB device with the correct BIOS flashing utility and with the new BIOS firmware.

The BIOS firmware can be downloaded from Asus support pages by searching for the Eee Box model name (B202).

The documentation for the Eee Box was not very helpful. It said that there is a upgrade utility in the OEM version of Windows that the computer came with. However, the first thing I had done with the computer was to wipe the hard drive and to install Ubuntu.

The solution to the problem is to insert a FAT-16 formatted USB device with the desired BIOS firmware, then boot while pressing Alt+F2 to get into a special boot menu. There, one can choose the firmware file.

This was definitely the simplest BIOS upgrade processes I have come across – once I found the information on how to do it.

Categories
Computers Gadgets Linux

Upgrading the RAM on Eee Box

As I wrote in a previous post, I recently purchased an Eee Box. As I targeted it as a replacement mail and web server I thought that the included 1GB RAM was a tad low. I bought the replacement memory together with the Eee Box itself and here are some images and comments outlining the process of upgrading the memory.

Both the hard drive and the memory are accessible from the bottom of the device. Removing the table stand (notice the screw mount on the left in the image) reveals the following:

Before RAM upgrade

The left one of the two Eee Box stickers needs to be removed in order to access the hard drive. The sticker on the right needs to be removed for the RAM upgrade. Although I was only planning on upgrading the RAM, I peeled off both stickers.

Without stickers and with the hard drive removed

The hard drive is a Seagate Momentus 5400.5 160GB. It looks simple enough to switch out for a larger one if that is required. 160GB is plenty for the tasks that I will use it for so I didn’t change it.

Original Eee Box hard drive

With the two screws on the right (see image above) removed the side cover can be removed. This led to some confusion as the few other guides on the Internet didn’t mention exactly how to pry off the cover. To help you out, have a look on the following image. The side where the screws were (shown with red) is already loose and there is no need to try to start from there. Instead take a table knife and work on the spots shown with the green crosses where the cover is kept in place.

How to open the Eee Box

With the side cover off we now need to unscrew just one screw in order to access the memory compartment in the lower right:

Eee Box with the side cover off

The unit was originally equipped with two DDR2 667 MHz SO-DIMM cards of 512MB each.

The original RAM memory is exposed

I took out the original memory and instead inserted two 1GB DDR2 667 MHz SO-DIMM cards made by Crucial.

New RAM memory

Finally, I booted the computer and checked the memory.

Task manager showing 2GB of RAM

Five minutes after this I had started installing Ubuntu 🙂

While this process was slightly more complex than changing memory on just about any other computer (laptop or stationary) some kudos goes to Asus for making it much easier to change the RAM than what was the case on my Acer Aspire One. The only really non-trivial part was getting the side cover off without breaking it. However, once I knew how to open it, it was actually trivial as well.

Categories
Computers Gadgets Linux

Uuunboxing the Eee Box

The Eee Box has finally been launched here in Sweden. I have had my eyes on it for some time as I am in dire need of upgrading my old server (mail, web etc) and this looks ideal from a performance/electricity point of view. It also comes at a very good point with the rather recent LTS release of Ubuntu 8.04 – although I will probably go for the bleading edge and run Intrepid Ibex when it is released on October 30th. The Eee Box is only available with Windows here in Sweden but hopefully that will change over time.

Here are some unboxing images:

The box from the outside
The box from an angle
Revealing the Eee Box
The Eee Box
Keyboard
Power and mouse
Documentation
PSU
Stand and mount
Mouse
Antenna and screws
Manuals and discs
All contents
Eee Box on its stand
Size comparison with iPhone
Rear connectors
Front connectors
BIOS main screen
BIOS advanced screen
BIOS power screen
BIOS boot screen
BIOS tools screen
BIOS exit screen

css.php