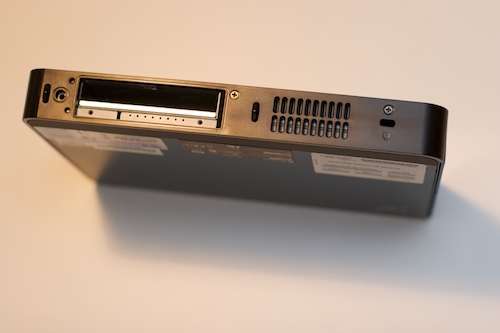
As I wrote in a previous post, I recently purchased an Eee Box. As I targeted it as a replacement mail and web server I thought that the included 1GB RAM was a tad low. I bought the replacement memory together with the Eee Box itself and here are some images and comments outlining the process of upgrading the memory.
Both the hard drive and the memory are accessible from the bottom of the device. Removing the table stand (notice the screw mount on the left in the image) reveals the following:

The left one of the two Eee Box stickers needs to be removed in order to access the hard drive. The sticker on the right needs to be removed for the RAM upgrade. Although I was only planning on upgrading the RAM, I peeled off both stickers.

The hard drive is a Seagate Momentus 5400.5 160GB. It looks simple enough to switch out for a larger one if that is required. 160GB is plenty for the tasks that I will use it for so I didn’t change it.

With the two screws on the right (see image above) removed the side cover can be removed. This led to some confusion as the few other guides on the Internet didn’t mention exactly how to pry off the cover. To help you out, have a look on the following image. The side where the screws were (shown with red) is already loose and there is no need to try to start from there. Instead take a table knife and work on the spots shown with the green crosses where the cover is kept in place.

With the side cover off we now need to unscrew just one screw in order to access the memory compartment in the lower right:

The unit was originally equipped with two DDR2 667 MHz SO-DIMM cards of 512MB each.

I took out the original memory and instead inserted two 1GB DDR2 667 MHz SO-DIMM cards made by Crucial.

Finally, I booted the computer and checked the memory.

Five minutes after this I had started installing Ubuntu 🙂
While this process was slightly more complex than changing memory on just about any other computer (laptop or stationary) some kudos goes to Asus for making it much easier to change the RAM than what was the case on my Acer Aspire One. The only really non-trivial part was getting the side cover off without breaking it. However, once I knew how to open it, it was actually trivial as well.